You notice a brown stain on the ceiling after a storm. A day later, there’s a slow drip into a saucepan you’ve wedged between the sofa and the TV. Your first thought is obvious: the roof is leaking. Your second thought is far more frustrating. Where on earth is the water actually getting in?
Finding a roof leak is rarely as simple as looking directly above the damp patch. Water can travel several metres along rafters, felt, and insulation before it drips through your plasterboard. In some cases, what looks like a roofing leak is actually condensation, and no amount of tile patching will solve it.
This guide walks you through how to find a roof leak properly, safely, and methodically, whether you’re dealing with a traditional tiled roof, a slate roof, or a modern pitched roof with multiple valleys and chimneys.
Why Finding a Roof Leak Is Harder Than It Looks
The single biggest mistake homeowners make is assuming the leak is directly above the stain. Water does not fall in a straight line once it gets under your roof covering. It runs along the underside of tiles, tracks along beams, soaks into insulation, and follows the path of least resistance. By the time you see a drip in your bedroom, the actual entry point could be two or three metres away, often higher up the roof slope.
There is also the confusion factor. A roof leaking problem that appears in winter might not be a leak at all. Condensation in the loft is incredibly common in British homes, particularly in older properties with poor ventilation, and it creates almost identical interior signs. Before you start hunting for broken tiles, you need to know which problem you are actually dealing with.
Signs of a Roof Leak
Once you’ve ruled out condensation, look for these reliable indicators of a genuine leak:
1) Ceiling stains:
Brown, yellow, or grey discolouration, often with darker rings at the edges. Fresh leaks are darker; older ones fade to a dull yellow. The stain shape matters too: a leak typically creates an irregular, spreading patch rather than neat blotches.
2) Peeling paint or bubbling plaster:
Moisture trapped behind the emulsion causes it to lift away from the plaster. If you press it gently and it feels spongy, water is sitting behind the surface.
3) Musty smells in upstairs rooms:
Even before you see visible damage, a persistent damp odour suggests moisture is getting in somewhere. Trust your nose.
4) Dripping during rainfall:
This sounds obvious, but note exactly when it happens. A drip that starts ten minutes into heavy rain suggests water is travelling some distance before it falls. A drip that starts instantly suggests the breach is directly above or very close by.
5) Sagging ceiling sections:
If the plasterboard is bowing, water has saturated the material, and it’s losing structural integrity. This needs urgent attention.
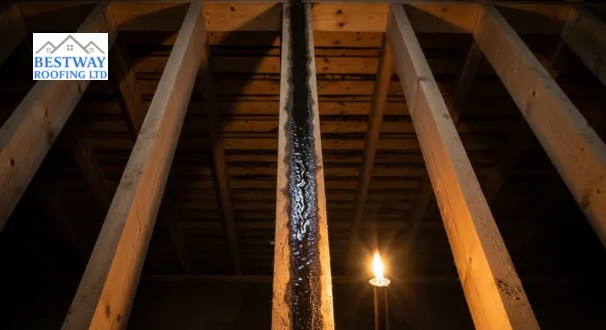
How to Check Your Loft for Leaks
Your loft is the best place to start locating a roof leak. Wait for daylight, take a torch, and be careful where you step. Only walk on secured boards; never on insulation or plasterboard.
Look for daylight carefully.
Look for daylight carefully. Small pinpricks of light through the roof covering can indicate gaps. If you spot minor tears or holes in the felt, a temporary roof felt repair from inside can help limit damage while you arrange a proper fix.
Follow the water trails.
Water leaves evidence as it travels. Look for dark streaks on rafters, damp patches on the loft floor, or water marks on the underside of the roofing felt. These “flow lines” point back toward the source. Crucially, follow them uphill. The entry point is almost always higher than where the water ends up.
Check the insulation.
Damp insulation compresses and darkens. If one area is sodden while the rest is dry, you’re close to the leak. Lift the insulation carefully, as water often pools on the vapour barrier or plasterboard beneath it.
Take measurements.
If you find a damp area, measure its distance from a fixed reference point you can see from outside a chimney stack, a party wall, or a dormer window. This makes locating the corresponding spot on the roof far easier.
Check around penetrations.
Chimneys, soil vent pipes, and loft windows are the weakest points. Look closely at where the roof meets these features. Staining on the chimney breast inside the loft often means failed lead flashing or deteriorated pointing on the stack itself.
Common Causes of Roof Leaks in UK Homes
British housing stock has its own quirks, and certain causes of roof leaks show up again and again:
1) Failed lead flashing:
Lead is durable, but over the decades, it can crack, lift, or pull away from chimney stacks and abutment walls. The pointing (mortar) that holds it in place also crumbles with age. This is one of the most common sources of a leak from the roof to the chimney.
2) Slipped or cracked ridge:
The tiles along the top ridges and diagonal hips are mortar-bedded. Frost, wind, and vibration loosen them over time. Once the mortar falls out, wind-driven rain gets straight in.
3) Valley gutter problems:
Whether your roof has a lead-lined valley or a modern GRP version, these channels handle huge volumes of water. Block them with moss or leaves, and water will back up, finding its way under the adjacent tiles.
4) Broken or missing tiles or slats:
High winds, falling branches, or simply age can leave gaps. On slate roofs, look for “nail sickness” slats that have slipped because the nails have corroded.
5) Party wall flashings:
In terraced or semi-detached homes, the junction between your roof and your neighbour’s can be a weak point if the lead flashings or soakers have deteriorated.
6) Loft conversion abutments:
If a dormer or loft extension has been added, the junction between the new roof and the existing one is a prime candidate for water ingress if the flashings weren’t installed correctly.
7) Underlay failure:
Older bituminous felt becomes brittle and tears. Modern breathable membranes can sag into the gutter if not properly supported, creating a trough that collects water. Once the underlay starts failing, the roof may need replacing sooner than expected.
8) Punctures and holes:
Satellite dishes, solar panel mounts, and previous repair work can all leave holes if not properly sealed. Even a small nail hole in the wrong place can let in surprising amounts of water during a storm.
The Hose Test: When and How to Use It
If you’ve narrowed the problem to a general area but can’t spot the breach, a controlled hose test can help confirm it. You’ll need two people and a dry day.
How it works: One person stays inside near the damp area with a torch. The other, on the ground, uses a garden hose to soak a specific section of the roof. Work from the bottom of the slope upward, one section at a time, spending several minutes on each area. If water starts dripping inside, you’ve found your zone.
Important rules:
- Never walk on the roof to do this. Work from a ladder at the eaves, or use a hose from ground level if you can reach.
- Start low and work up. If you start at the top, water will run down and mask the true source.
- Be patient. Water can take several minutes to travel through the roof structure.
- Don’t do this in high winds or if the roof surface is slippery.
If the hose test doesn’t produce results, the leak may be intermittent, only appearing during prolonged heavy rain or wind from a specific direction.
Seasonal Patterns: When Leaks Reveal Themselves
Understanding when your leak appears can tell you a lot about the cause.
- Winter: Freeze-thaw cycles crack mortar, open up tile gaps, and damage leadwork. Driving rain from the southwest, the UK’s prevailing wet wind direction, forces water into weaknesses that summer showers never reach.
- Spring: The first sustained heavy rains after winter often reveal damage caused by frost. This is when many homeowners first notice a roof leaking problem.
- Summer: Intense heat causes expansion, and sudden thunderstorms test every weakness. Dry spells also make mortar and sealants shrink, opening gaps that autumn rain will exploit.
- Autumn: Blocked valleys and gutters from falling leaves are the primary culprits. Water backs up and finds alternative routes into the roof structure.
When to Call a Professional
There’s no shame in admitting defeat. If you’ve checked the loft, inspected from the ground, ruled out condensation, and still can’t pinpoint the source, it’s time to bring in a roofing contractor. The same applies if the roof is complex, steep, or high; safety always comes first.
A professional roofing company will have access to tools and techniques beyond the scope of most homeowners: thermal imaging, moisture mapping, systematic spray testing, and the experience to interpret what they find. Trusted Roofers will also spot secondary damage you might have missed, such as rot in the rafters, compromised underlay, or structural movement that needs addressing.
For complex chimney configurations, historic properties with slate and leadwork, or roofs with multiple valleys and dormers, specialist expertise is essential. A general roof repair service might patch the symptom without fixing the underlying cause, leading to repeated problems.
If you’re struggling to locate a persistent leak, Bestway Roofing Limited can carry out a thorough inspection using professional-grade detection methods to find the source quickly and accurately.
Final Thoughts
Finding a roof leak takes patience more than anything else. Water rarely drips where it enters, so resist the urge to patch the first broken tile you spot. Work through the checks methodically, rule out condensation, follow the trail uphill in the loft, and use a hose test only when you have narrowed the area down. Rushing it usually means fixing the wrong thing and watching the stain spread a month later.
If you have spent an afternoon in the loft with a torch and still cannot pin it down, there is no shame in calling it in. Some leaks only show themselves in driving rain from a certain direction, or hide beneath sound-looking tiles where the underlay has failed. A proper diagnosis now saves you from replacing ceilings, insulation, and timbers further down the line, and it means the next storm passes without you lying awake listening for drips.
Frequently Asked Questions
Q. How do I tell if it’s a roof leak or condensation?
Condensation appears during cold weather even without rain, often causing widespread damp or frost in the loft. A genuine leak creates a defined water trail, appears during or immediately after rainfall, and is usually localised to one area. Condensation is a ventilation issue; a leak is a roofing issue.
Q. What should I do if I can’t find a leak in my roof?
If you’ve checked the loft, ruled out condensation, done a ground-level inspection, and still can’t locate the source, call a roofing contractor. Persistent hidden leaks often require professional detection methods like thermal imaging, moisture mapping, or systematic spray testing to pinpoint accurately.
Q. Will my insurance cover roof leak detection?
Buildings insurance typically covers the cost of repairs if the leak is caused by storm damage or an insured event. It usually does not cover damage resulting from wear and tear or lack of maintenance. Many policies include “trace and access” cover, which pays for the cost of locating a leak, including removing and reinstating plaster or flooring. Check your policy wording carefully.
Q. Can a roof leak fix itself?
No. Small leaks may seem to stop during dry spells, but the underlying damage continues. Water ingress rots timber, corrodes fixings, and degrades insulation. What starts as a minor drip will always worsen over time.
Q. How do I find a leak in a tiled roof?
Check the loft first for water trails and daylight penetration. From the ground, use binoculars to look for missing, cracked, or slipped tiles, damaged ridge tiles, and lifted flashing. Focus on valleys, chimneys, and any roof penetrations, as these are where water most often gets in.
Q. How much does roof leak detection cost in the UK?
A visual inspection by a roofer typically costs between £80 and £150. Advanced methods like thermal imaging or systematic moisture surveys range from £400 to £1,600 depending on the roof size, access difficulty, and technology used.